Saturday, October 26, 2013

The Very Bowels

The last two Tuesdays and the last two Saturdays were spent in what I call the very bowels of this project - welding out the primary weldments of the boiler.  The two tube sheets are now in, as is the furnace.  The horizontal stays are the last weldment.

It is one thing to summarize; another to carry out.  First, the 0.375" thick tube sheets are machined or ground for the relief bevel with @ 0.90" land.  The sheet is then tack welded in place with short tacks.  Then a 7018 (a low hydrogen rod) root pass is welded in.  (Our shop utilizes a 7018 root pass procedure in order to avoid root cracking, a common problem with 6010 wire on circular or pipe weldments.)  The root pass is almost ground out with a 4.5" grinder to ensure complete penetration and to ensure that there are no inclusions in the metal.  Following passes are laid in and ground out as needed.  I skipped around to minimize bowing and distortion, but it is hard to avoid.

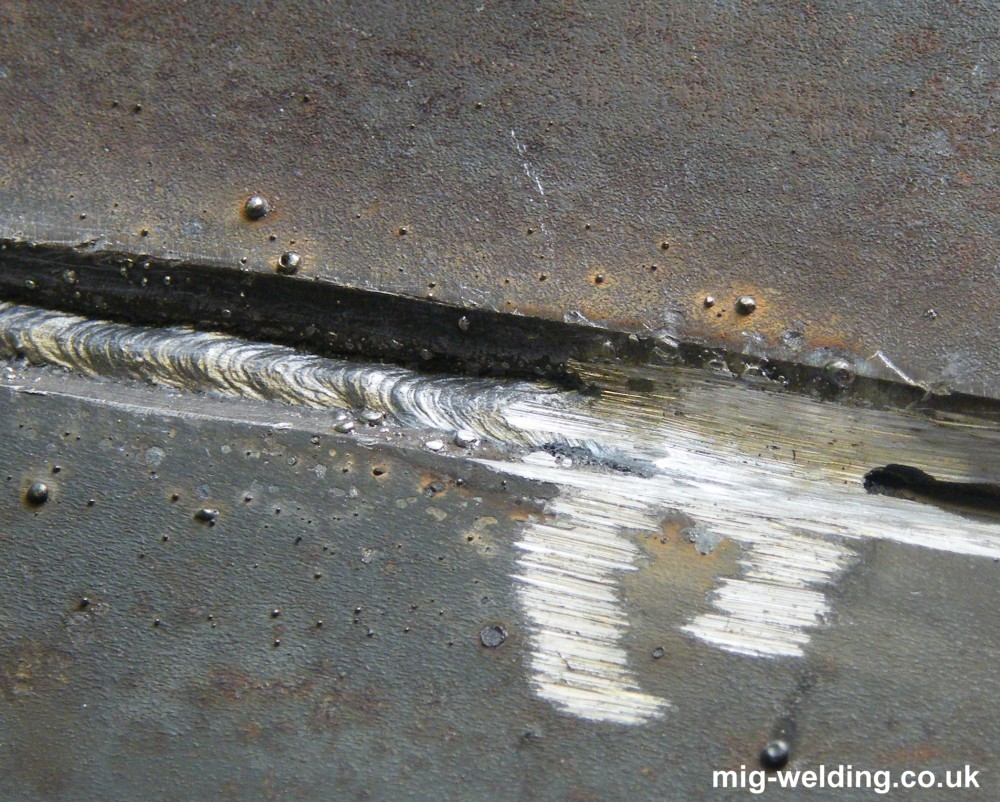
Here is an image off the web.  It is of a MIG weld but it is still illustrative.  It shows a root pass, the pass ground down to eliminate inclusions and the "keyhole" at the arc, a mark of good penetration.
Sunday, August 4, 2013

Interior Update

A picture tells the story - so let's talk about what we see here that's new:

The deck substructure is finished except for the stern.  I was getting ready to finish that substructure too - the stern king plank is in the foreground - when the rudder and steering gear called out for attention before being buried under structure.  The rudder gland is mounted inboard with a piece of cutlass bearing bonded into the hull structure to guide the rudder post.  One can see the guiding dowel still in place.  There's a story there too.  We have had as wet a summer as the cousins across the pond did last year.  The dowel has swelled in the humidity, so it's there until I put some heat lamps on it ...  Rudder, quadrant and cables to follow.

Beyond the "rudder post" is the removable hot well receiving a dry fit.  One can see light through it because I have not yet bonded in the bottom.  The hot well will sit under part of the starboard seats.  It will be held in place with cleats.  Disconnecting some unions and lifting it out will facilitate annual maintenance and cleaning.

Sunday, July 7, 2013

Stemhead and Deck Structure

Finally whittled down that huge hunk of doug fir and laminate that is the inner and outer stem.  Here it is prior to sealing and finish sanding.  You can see where the staples were on the laminate before I pulled them.


Also a few shots of the subdeck structure and carlins.  In the area just in front of the coaming, I probably went overboard with the 0.625" okoume - no pun intended - but I wanted plenty of support for this area of the deck.  Notice the temporary cleats under the ply, giving the necessary camber until the epoxy sets up.


Here's a shot of the kingplank and the foremost carlin.  The kingplank is laminated okoume and the carlin is poplar.


I took the following shot because it intrigued me and highlighted a number of construction details: the scarfed fir sheer and the fit and bond at station No. 2 of sheer, topsides, bulkhead and subdeck.  The black of course is topsides paint that worked its way down during that process.  This is the kind of stuff that will soon be obscured.  It will be nice to remember what it looked like.


Thursday, June 27, 2013

WoodenBoat Show Eve

Well, it's WoodenBoat Show Eve, when all of us trolls emerge from our shop caves to glory in our art.  For my own part, I've been welding and fitting sub-deck structure since the last post - things that are not photogenic, which hopefully explains the dearth of updates.

To whet one's appetite, go here for show information.  See you at the show!

Saturday, April 27, 2013

Boiler Erection

Here's something new.  This is the shell of the boiler for the launch.  The perspective is looking at the bottom of the barrel - it's a scotch marine - the coupling front and center is the blowdown.  The hand hole to port is for bottom wash and clean-out.  On the inside one can see the cluster of four outlets that make up the two safeties, whistle and auxiliary.  The main and throttle are further forward.  They'll have a drypipe fitted later.  The starboard upper hand hole is for washing the tubes.  Not bored yet are the feedwater inlets and the other two 1.5 wash-out holes.  This is a certified build and will receive an "S" stamp when it is complete.  Sorry about the quality of the photo - camera phone.


Monday, April 8, 2013

Spring!

I throw open the shop doors!  I thought it would never get here.  Now things can cure without heat lamps and what not.

I glued in No. 1 bulkhead this past Saturday morning.


Here's the view from the front.  The little block in front of the feedwater tank supports is a mast step.  Why a mast step?  I don't know, some day I may want to add a fore mast.  How else would one rig ship for holidays, etc.?  I'll sand the fillets after they fully cure and blend the paint.


Tuesday, April 2, 2013

Interior Painting & Sanding

Painting and sanding all of the parts that one won't see.  But it's all about protecting the composite finish and making it easier to clean.  This picture was taken with my phone camera, so the lines are a little distorted.  One can see the first coats of Grand Banks Beige in the counter stern and extending forward from bulkhead No. 5.  Bulkhead No. 1 still isn't glued in yet as I finish up things in the forepeak that would be more difficult to do later.