Saturday, August 18, 2018

Fire Up!

After completing some temporary copper piping ( I couldn't wait for the bronze to crawl here), it was time to fire it up. Several days before, the boiler was filled, a little oxygen scavenger added and I took it up to working pressure with the hydro pump to make sure all was tight. Water was dropped to a third glass.

In true UK tradition, I lit it off with Kingsford Match Light Charcoal ...


In short order, the fire was over the grates and coal was added:


Here's looking up through the stainless grate bars at a hot fire. In an hour, I had drafting steam, but didn't force it because I wanted to see how it would do naturally aspirated. In two hours, we were at warming through pressure (100-125), and shortly thereafter, the safety let go at 200 psi:


I had told the Mrs, "Watch the neighbors (whose house you see) come running when the safety lifts." "Hey! You all right?!" "Yup. Just the safety." Another typical suburban Saturday ...

A rain storm hit while we were firing things up. So the boiler was rained on, not for the last time:


Some data:
- Combustion chamber door never got above 350 F, so I'm pleased with the plenum insulation, etc. The door itself is still rather plain. So I'm imagining some bronze hand rails, a warming shelf for baked goods and maybe an espresso maker if I can figure out how to pipe it.
- The boiler is more efficient than I imagined. The smokebox and smokebox plenum never got above 350 F. This will change under forced draft. The permanent stack will have a pyrometer so it can be monitored with greater precision.
- With jacketing, I expect it to be more pleasant to be around. It was a hot day ...
- Anthracite firing went as planned. This was pleasing as it is a compact and hot fuel. Plus it is local. A scuttle and a half (twenty pounds?) brought us to working pressure.

Boiler Summer

So this is the summer of the boiler. It was sitting in the corner, collecting dust so I wanted to finish it.

First to be finished was the smokebox:


That's not a fire in the furnace. The shop is humid so a heat lamp keeps the local dew point from condensing on and rusting the steel. As was typical, the smokebox door is hung on hinges and secured with dogs. It can quickly be unsecured and swung up to snug a tube, clean the tubes or whatnot. The unfinished water glass is to the right.

Here's another picture of the smokebox end with a temporary stack for fire up:


Next was to finish the grate bearers and the grates. The grates are solid bar, UK style. In this photo, the firebrick is visible lining the combustion chamber. For anthracite firing, fire brick is essential for retaining and reflecting the heat. For hardwood, they could be taken out except for the furnace end wall.


The grate area is two square feet with the brick in. Below's a picture of the combustion chamber before the reflective plenum is placed in. After the plenum was in, I sealed everything with a 5,000 F goo.


The refractory brick is shown before I covered all of the supports with cement.

Here's a shot of the outside:


Items of note: There's the combustion chamber seam cover strip to the left. Two angle iron supports, center and front behind the glass will support the jacket later. The insulation will be an inch thick. No one should have a cow about the piping. Except for the schedule 80 steel nipples, it is all class 300 bronze and brass.

Wednesday, February 28, 2018

Feed Pumps

Picked up some pumps ... Here they are on their pump platforms:


They were rebuilt by Kelly Anderson. Here's a shot of fitting the jacketing on the engine with temporary brass machine screws. It is finished now, though I don't have a picture. The jacketing is nickel with stainless screws.


Catching up Around Here

So, receiving requests for updates, I'm going to post photos without a lot of commentary ... Boiler front, June 2017:


Feedwater pump platform with pump template. The platform is made out of sassafras ...


Helm, coal bunker with gates and laminated coaming (sapele).


Portside aft seat made out of a chestnut church pew. One can see I am also fitting the rear of the coming. It will get a steamed white oak cap.


Lastly, some eye-candy, the forward deck and fitting some chocks:


Saturday, November 26, 2016

Fore Seats and Seat Backs

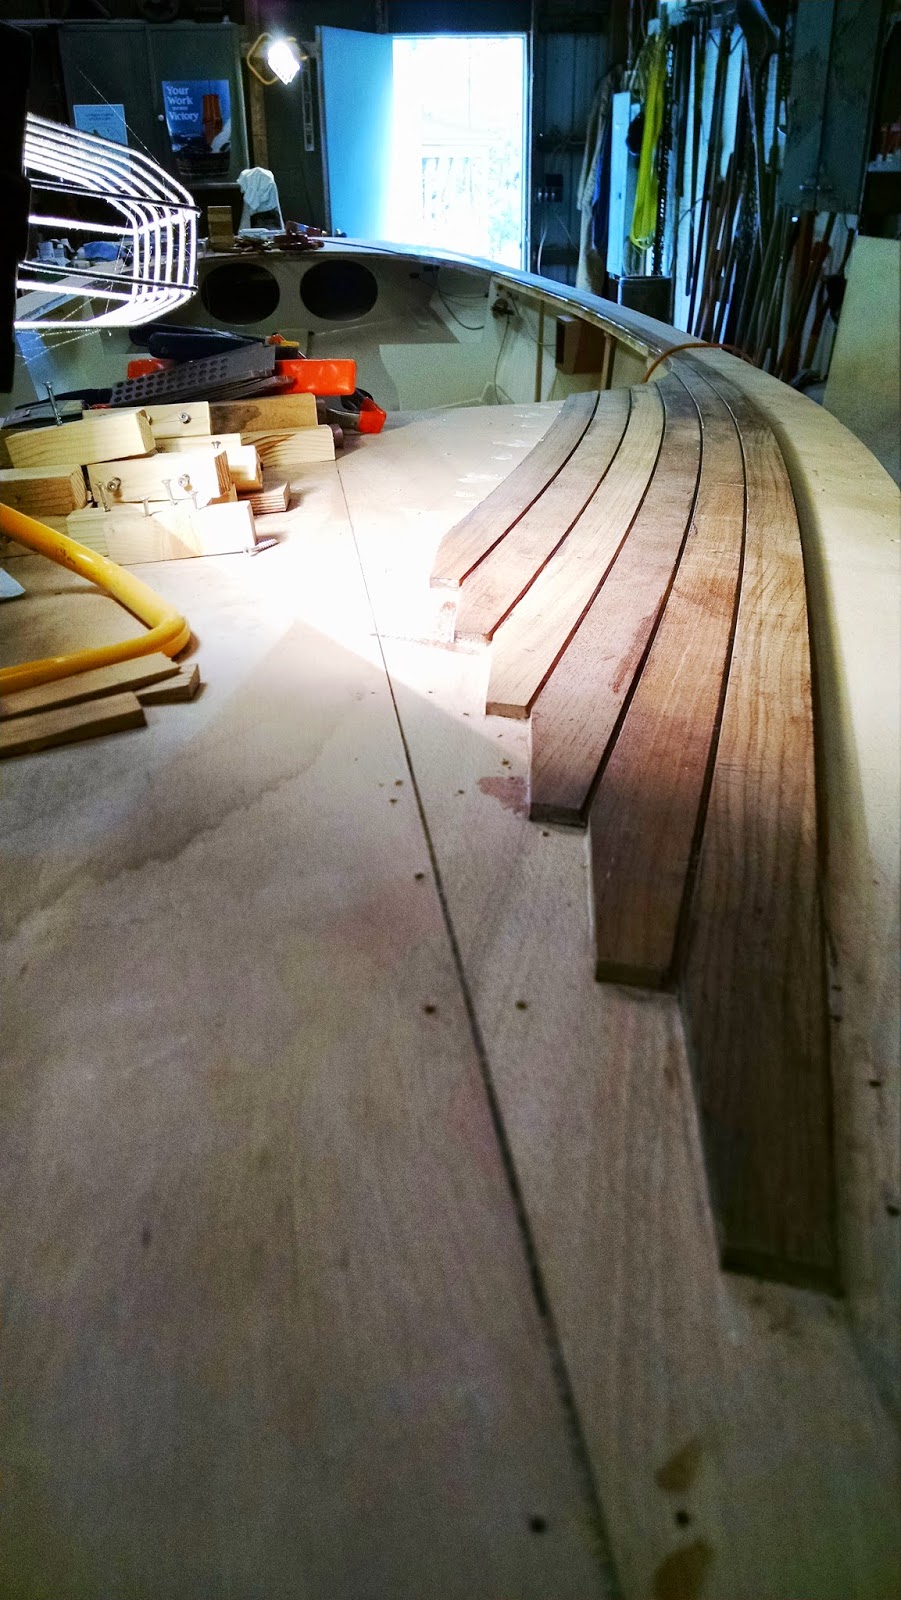
One can see where this is going - the aft seat concept in place, it was time to move to the fore seat template and strakes. As for the rear seat, I made a template out of CDX that was lying around and fit it forward. Here's a photo of the port, fore seat template in place and fitting the port strakes:


I threw some old 0.75" plywood I had lying around onto the floors. I was tired of sliding on saw dust into the bilge. The strakes aren't as loopy as the photo makes them out to be. Must be some kind of camera phone distortion going on ... Another shot looking forward:


Everything is being made so it can easily be taken out of the hull for refit, renewal and whatnot. Hence, the reliance on bronze fasteners and seats made in halves. Once the seats are all finished, they'll come out anyway for primary piping runs and setting the boiler. The doors for the feed-water compartment, fore, are also finished. A photo of them will have to wait for another time.

The Coal Bunker

Iona will be fitted with two wing bunkers for coal. Each bunker will be accessed through a bronze deck scuttle. The bunkers carry around 100 lbs of coal. We'll see some day how far that gets us ...

The bunker bulkhead is made out of mahogany marine ply 0.625" thick. The below photo shows it being fitted and mounted with temporary stainless screws. The bronze gates and slides are not yet in place.


I forget whether I mentioned earlier - the steering station is a standard Edson bulkhead mount. We had to re-machine the spindle for an antique wheel out of Greenock on the Clyde.

Once a gate on the bunker is raised, the coal will spill out on the deck plate. Here's another shot:


Helm Station

In the midst of fitting the seat backs, the steering gear was connected for good and the helm station finished. Here is a shot of the gear connected to the bulkhead steering box:


The bottom seat back strake is in place and finished with my interior finish: raw linseed oil, turpentine and pine tar.  A heavenly aroma now fills The Works. Here's another shot of the steering station and gear:


The conduit behind is for 12vdc if we ever go there ... Two other shots of the finished seat backs:


Fitting the Seat Backs

Once I had an idea what the aft seats would look like, I began to fit the seat backs. These are made out of leftover Honduran mahogany planking that was lying around. Here, the mahogany is being fit up:


One can see that the steering gear is not hooked up yet. I had disconnected it while laying the deck. The chestnut piece running between No. 4 and No. 3 stations is a front seat support.

Reclining on Chestnut

After laying the deck, there are a number of things to fit into the hull before the coaming goes on. Also, I had a seat idea that I was anxious to try. You see, it goes like this: The congregation where I served for a number of years removed two front pews for the usual reasons - space for more theatrics, weddings, worship combos, etc. I had reason to believe that the pews were American chestnut since much of the interior is finished in chestnut.

Strapped to the roof of the mini-van, they made their way to the The Works, where they were stripped of cushions and disassembled. (True story: The two front pews were used since time immemorial - well, at least since 1925 - for the assemblage of the Sunday School children; boys on the right; girls on the left. The boys' pew had a reef of used chewing gum on the underside of the bench proper. Girls, of course, would have disposed of their chewing gum in the carefully saved wrapper.) The main seats were edge-glued, contoured chestnut.

A template was fashioned and similar grain of sassafras was used to make up where the chestnut could not extend in width. I am reclining on the port side bench prior to its finishing:


Sunday, July 31, 2016

On Being "Over the Top"

A year and a half on a deck?  Really?!  Yes. Let me explain, though it is indefensible ... They say a picture is worth a thousand words ...


This is the fore deck as I was fitting the king plank. (Pay no attention to the 957 bronze dong - it is merely holding the plank in place.)  All art is indefensible in a world of 24/7 news cycles, starving children and the like. But is has to be created, or else we succumb to the inhumanity of the age ... 

The picture below is the aft deck, with seams caulked.


"What if you spill 20W oil on it?" a colleague (well, Kelly) wonders.  Yes, and the Works could burn down.  Art is always vulnerable. Natural teak is pretty resilient.  This Spring I helped a couple of blokes deliver a yacht with a natural teak deck from Florida to Rhode Island.  While refueling at sea, I spilled some No. 2 on the deck.  (The scuppers were plugged up so none made it to sea - you turtle-huggers can stow your harpoons ...)  The deck was discolored for a half a day, and then returned to its natural bleached tan.  It's okay; teak has been a deck of choice for generations, and I believe it will serve Iona admirably. 

Wednesday, January 6, 2016

Cover Board Templates

No, I didn't go to seed ... decking just goes slow. I've also been finishing the engine in between planks. As a tease, here is a recent photo of the engine tops.


There, that got your attention. Now on to the more prosaic job of fitting cover board templates. Here's a shot of the very stern, where the aft quarter cover boards meet the stern king plank. The template material is adhesive opaque shelf paper. It's nice and stiff and I can see my marks through it. It also has handy-dandy grid lines on it. I have it tacked on to the sub-decking with brads. For finer cutting around the joggles, I use an Xacto knife. Of course the proof of the pudding will be to transmit the shape and cut to the planed, expensive teak planks. But this should minimize the error.


Here's a shot of the starboard aft quarter plank template with a little more detail. Like the decking, there is room for a seam relief between the decking and cover board. When I saw these things out, I'll have to strike the balance between not leaving too much proud to work out later and cutting it close. But then, that's finish work everywhere ...


Overnight temperatures in the shop have been 15 F (-9 C), so it's time to move the center of effort back to the shop at work and finish the boiler appurtenances there.

Thursday, June 25, 2015

Wooden Boat Show Eve

Checking the oil and kicking the tires before heading to Mystic tomorrow.  Time to wander dreamily through the hand tool vendors, display boats and chandlers.  We'll miss a Saturday working on the deck, but there are priorities ... Speaking of the deck:


One side is now done and we're wrestling in the starboard side.  Cover boards are ripped and awaiting planing.  (The scrap of plywood over the starboard foredeck is to ward off a stubborn intermittent leak in the roof that manifests itself during some summer thunderstorms.)

Friday, May 1, 2015

And the Decking is "Proceeding According to Precedent ..."

... To quote Kipling.

What a winter! The Works were locked in a temperature-induced, productivity death grip.  I was able to continue slowly on the smokebox and boiler at work, but since that involves a commute, it is not near as handy.  Below is a shot of the foredeck.  The joggle fit and trim will be exciting to do.


The king plank and cover boards are on hand and await planing to the same thickness (0.312").  The question was raised, "So how far can you bend that teak sideways?"  On the stern deck, the curve is to a sixty (60") inch radius.  One piece protested while bending to the dry fit.  It shattered in my hand, not unlike glass.  We were impressed.

Another piece jumped the clamps - I'm not really sure how that happened - whirled through the air like a Venetian blind and landed butter-side up.  Phew!

Tuesday, January 20, 2015

"So how will that engine work anyway?"

A common question, and up until now, I had yet to find a compelling graphic aside from some video links that show marine compounds in operation.  But wonder no more ... colleague Mr Anderson sent me a link that contains a graphic of an Olympic class engine.  The White Star Line Memorial Foundation has produced this graphic:

[Throw the reverse lever over and crack the throttle ...]

Iona's engine has a high pressure and low pressure cylinder, but no intermediate cylinders.

Saturday, January 17, 2015

Some holiday work

Work has slowed a little here in the dead of winter, though tonight we are experiencing a relative heat wave of 24F (-4C) compared to recent temperatures.

Christmas was duly celebrated by all at the Works ...


Here, Quinx is deep in her cups, polishing off the last of the eggnog.

I took advantage of a relatively mild day to begin laying the decking.  The sub-deck was warmed with heat lamps to help kick the epoxy.  It responded admirably.  I was surprised about the willingness of the teak to be bent laterally through as tight a curve as a 60-inch radius.  In this shot, the clamps have been removed at the sweep of the bow.  One can see the faint marks for the following planks, where they will rest against the king plank.


Meanwhile, the heated shop at work allows for continued tack up of the smoke box:


Tuesday, December 23, 2014

An Early Christmas Gift ...

... arrived the other day.  Teak decking from Boulter Plywood.  Boulter has provided most of the wood for Iona, so this is also a plug for Chris and the gang - thank you!

The first box laid out on the horses:


Carefully opened ...


Ahh ... vertical grain quarter-sawn 1.75" x 0.5" Burmese teak.  It will be planed to a thinner dimension before setting on the sub-deck.


A morale poster also showed up in the Works.  Best Beloved is puzzling over its significance ...


Sunday, December 14, 2014

The Smokebox

The boiler was on hold for a while as I pursued other things, as seen in recent posts.  The smokebox design then finally drafted by Mr Anderson, and the laser-cut pieces arrived, demanding attention and fabrication.

Below is the incomplete furnace frame with the partial smokebox frame set in place to adjust fit.  A hydraulic press punched the box frames for the door dog bolts.  I'm tacking the pieces together by stick, later to be seal-welded with 0.023 MIG wire.  The furnace and ash frames will be fitted with protruding sealing lips, and custom doors made with the appropriate drafting devices.  To be fitting and welding again is a great joy.

And yes, the boiler is on end inside the roof sheet of a Belpaire boiler, standing on its nose. A totally unrelated railway project ...


Sunday, November 30, 2014

The Steering Gear

One of the tasks that requires completion before the hull is decked is the fitting of the steering gear.  Said gear runs the range from the practical - clothesline run through zinc-plated blocks - to the sublime - sailboat systems manufactured by Edson Marine.  I admit I appreciate well-engineered systems.  Edson had me as soon as I received their catalog.  The heavy bronze quadrants; the exquisite sheaves - what could I do?  I had to throw money at them ...

After mounting the rudder, I came up with a system of blocks to act on the rudder.  A port-side helm station was always the idea.  The problem than became how to run the cables to the sheaves and the rudder quadrant.  This first picture is the helm station, with the steering chain and cables emerging from its aft side.


A standard Edson bulkhead gear will mount on the box, with the proper fine wood and all.  The standard taper didn't fit an antique wheel I received from Greenwich, UK, so we had to take the thing apart and machine the shaft.  (I'm still not sure whether or not I'll use the brake, though it is set up for it.)  The cables then lead aft to No. Four frame, in the foreground here, where two standard four-inch idler sheaves were set up to maintain the cable's suspension around the corner.

Here's another picture of the No. Four sheave mount:


Swapping orientation of the cables was then in order, as seen above, so that the bow swings in the proper direction with the wheel.  Piercing No. Five bulkhead got me into the rudder compartment proper where I could thread the blocks which act upon the quadrant.  Here's a shot of the stern compartment with the cables under temporary tension in order to see how the whole rig works:


It was pleasing to manipulate the chain at the helm box and watch the whole thing silently swing through its paces, without slop.  After determining that things would work, I then disassembled the cabling and idlers to seal the bulkheads where they were bored and to apply the correct fasteners.  Jibes are coming about "a rig that will sail around the Horn," etc., but I don't believe I'll be using the emergency tiller any time soon.

It will soon be time to finish decking ...

Sunday, September 28, 2014

A Rudder for Iona

Iona's rudder arrived from the foundry.  So it was off to get the keyway machined (courtesy of Mr. Anderson), and then back in the shop to be balanced, dressed and have a hole bored so the prop shaft can come out with the rudder hard over.

Next was the trial installation.  The hull was to be pivoted on its forward jack stands, so I knocked out the keel blocks forward of the stands and put the lift on bulkhead No. 5.  Here we arrive at our final height, measured by the rule in the shaft hole, with Quinx, the shop cat supervising as usual ...


With the stern hanging on the lift, the rudder is started home.


Gauging the progress of the shaft as the hull slowly descends.  Quinx is checking the credentials of the photographer, as no unauthorized personnel - by her definition - are allowed in The Works.


 The hull is almost on the stern keelblocks and stands.


The hull is home.  I've not totally settled on the means of rudder suspension.  A bracket with bronze collar will probably be on the underside of the king plank support, above the quadrant.  The shaft extends a little up through the king plank for the possibility of an emergency tiller, should the steering gear fail.  I'll figure on some kind of fancy bronze deck cover for it.


After head scratching and fabricating, there will be future lifts for the final installation.  That's when the packing gland, seen sitting to the right of the slings, will go in.

Looks like the local graffiti artists have tagged the hull again.  Not a bad sentiment on the kind of project that can tend to strain the checkbook and marital bonds ...  Photos courtesy of said graffiti artist - thanks, babe.